ruoyiApp中的页面是一个符合vue规范的文件,如果你熟悉vue,这里将非常快速上手。
1.如何新增页面
uni-app中的页面,默认保存在工程根目录下的pages目录下。
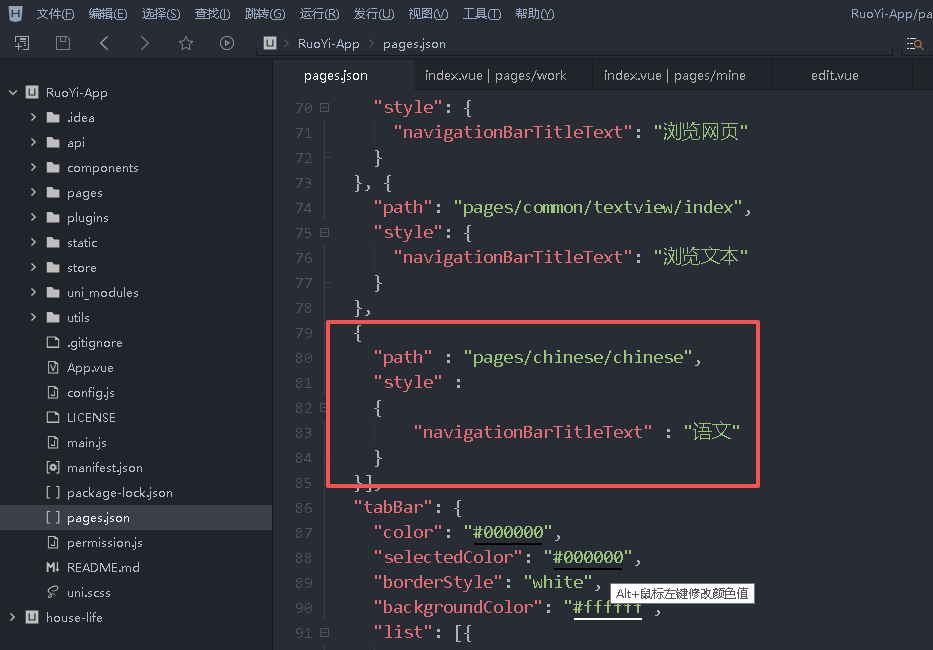
每次新建页面,均需在pages.json中配置pages列表;未在pages.json -> pages 中注册的页面,uni-app会在编译阶段进行忽略。
通过HBuilderX开发 uni-app 项目时,在 uni-app 项目上右键“新建页面”,HBuilderX会自动在pages.json中完成页面注册,开发更方便。
同时,HBuilderX 还内置了常用的页面模板(如图文列表、商品列表等),选择这些模板,可以大幅提升你的开发效率。
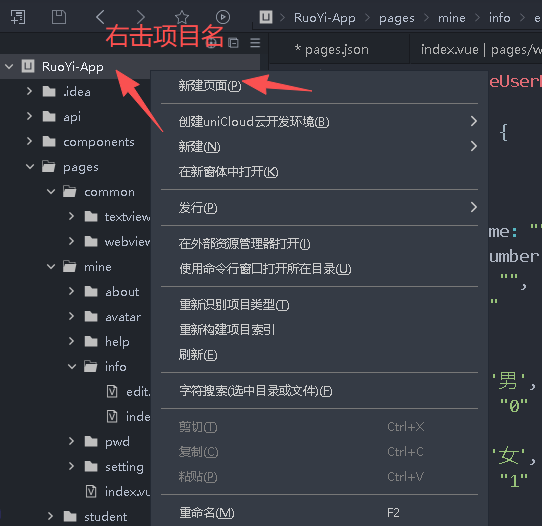
新建uni-app页面如下
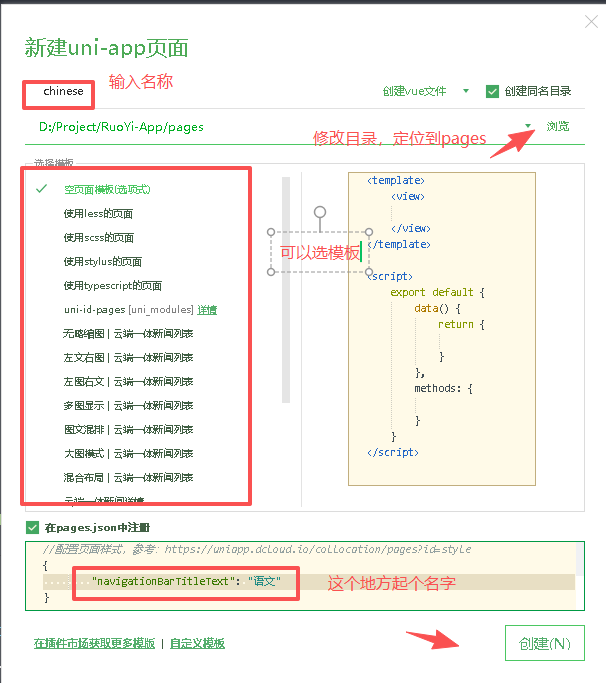
如果我们勾选了上图中的“在pages.json中注册”,可以在pages.json中查看刚才的信息。
那么我们可以通过浏览器暂时访问这个界面
http://localhost:9090/#/pages/chinese/chinese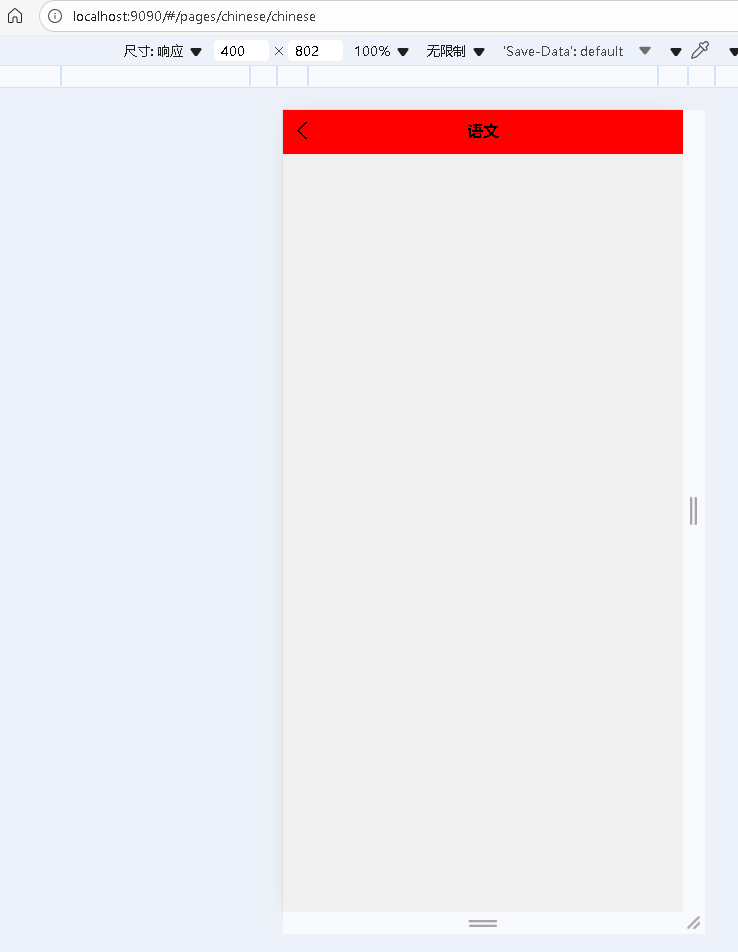
2.页面内容构成
uni-app 页面基于 vue 规范。一个页面内,有3个根节点标签:
- 模板组件区
<template> - 脚本区
<script> - 样式区
<style>
<template>
	<view class="content">
		<button @click="buttonClick">{{title}}</button>
	</view>
</template>

<script>
	export default {
		data() {
			return {
				title: "Hello world", // 定义绑定在页面上的data数据
			}
		},
		onLoad() {
			// 页面启动的生命周期,这里编写页面加载时的逻辑
		},
		methods: {
			buttonClick: function () {
				console.log("按钮被点了")
			},
		}
	}
</script>

<style>
	.content {
		width: 750rpx;
		background-color: white;
	}
</style>
template模板区
template中文名为模板,它类似html的标签。但有2个区别:
- html中
script和style是 html 的二级节点。但在 vue 文件中,template、script、style这3个是平级关系。 - html 中写的是 web 标签,但 vue 的
template中写的全都是 vue 组件,每个组件支持属性、事件、 vue 指令,还可以绑定 vue 的 data 数据。
在vue2中,template 的二级节点只能有一个节点,一般是在一个根 view 下继续写页面组件(如上示例代码)。
但在vue3中,template可以有多个二级节点,省去一个层级,如下:
<template>
	<view>
		<text>标题</text>
	</view>
	<scroll-view>

	</scroll-view>
</template>
可以在 manifest 中切换使用 Vue2 还是 Vue3。
注意:uni-app x 中只支持 Vue3。
script 脚本区
script中编写脚本,可以通过lang属性指定脚本语言。
- 在vue和nvue中,默认是js,可以指定ts。
- 在uvue中,仅支持uts,不管script的lang属性写成什么,都按uts编译。
<script lang="ts">
</script>
在vue的选项式(option)规范中,script下包含 export default {}。除了选项式,还有 组合式 写法。
页面级的代码大多写在 export default {} 中。写在里面的代码,会随着页面关闭而关闭。
export default 外的代码
写在 export default {} 外面的代码,一般有几种情况:
- 引入第三方 js/ts 模块
- 引入非 easycom 的组件(一般组件推荐使用easycom,无需导入注册)
- 在 ts/uts 中,对 data 进行类型定义
- 定义作用域更大的变量
<script lang="ts">
	const TAB_OFFSET = 1; // 外层静态变量不会跟随页面关闭而回收
	import charts from 'charts.ts'; // 导入外部js/ts模块
	import swiperPage from 'swiper-page.vue'; //导入非easycom的组件
	type GroupType = {
		id : number,
		title : string
	} // 在ts中,为下面data数据的 groupList 定义类型
	export default {
		components: {
		    swiperPage
		}, // 注册非easycom组件
		data() {
			return {
				groupList: [
					{ id: 1, title: "第一组" },
					{ id: 2, title: "第二组" },
				] as GroupType[], // 为数据groupList定义ts类型
			}
		},
		onLoad() {},
		methods: {}
	}
</script>
style样式区
style的写法与web的css基本相同。
如果页面是nvue或uvue,使用原生渲染而不是webview渲染,那么它们支持的css是有限的。
3.访问页面
在上面的描述中,我们在浏览器中访问了我们刚才创建的页面,实际开发中,我们不会通过这种方式访问,一般通过页面跳转的方式。
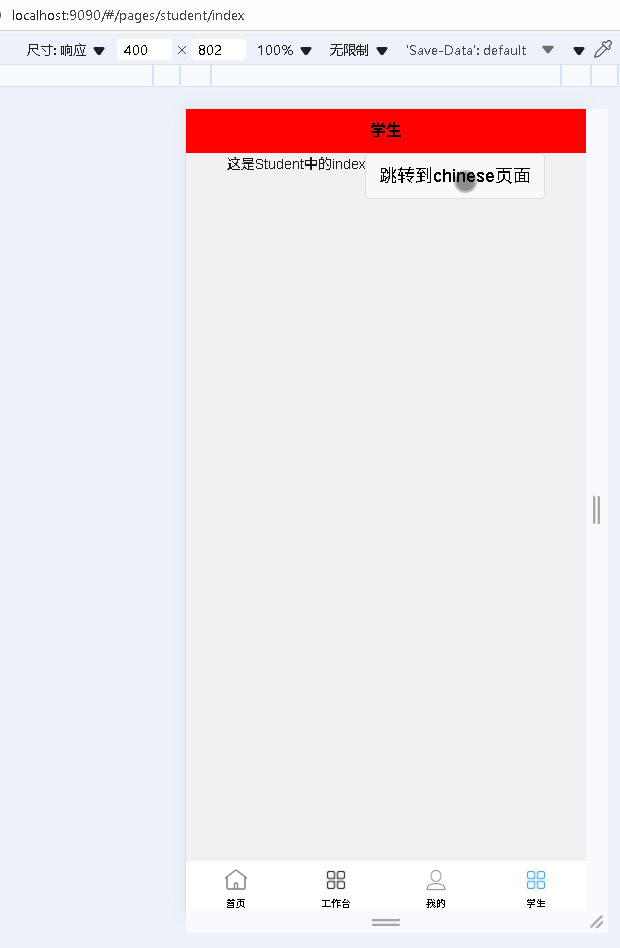
这里借助上一篇文章中的student中的index.vue文件,写一段跳转的操作。
(注意:不一定非得在这个文件中编写,只要跳转方法和跳转路径对就行)
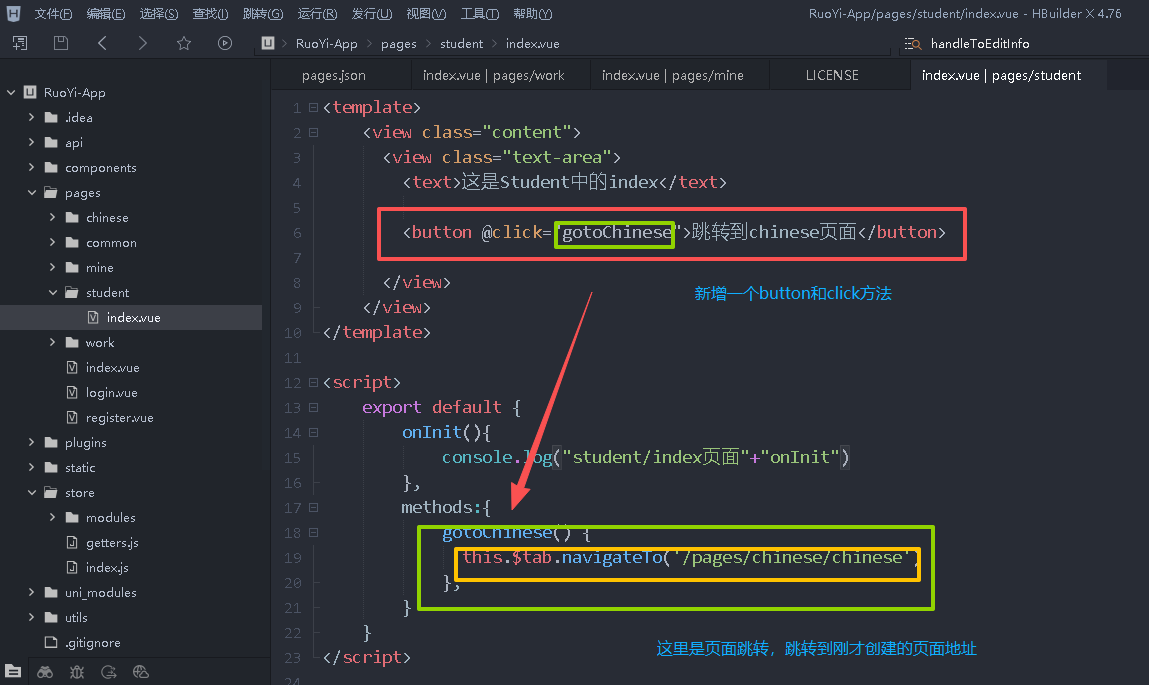
参考代码如下:
<template>
	<view class="content">
	  <view class="text-area">
	    <text>这是Student中的index</text>

		<button @click="gotoChinese">跳转到chinese页面</button>

	  </view>
	</view>
</template>

<script>
	export default {
		onInit(){
			console.log("student/index页面"+"onInit")
		},
		methods:{
			gotoChinese() {
			  this.$tab.navigateTo('/pages/chinese/chinese')
			},
		}
	}
</script>

<style>
	.content {
	  display: flex;
	  flex-direction: column;
	  align-items: center;
	  justify-content: center;
	}
	.text-area {
	  display: flex;
	  justify-content: center;
	}
</style>
效果如下: