这篇文章简单介绍一下vue如何引入Element UI 前端组件库 。
element UI 官网地址:
VUE 2.x Element – 网站快速成型工具
VUE 3.x element-plus.org
1.完整引用
引入方式:
npm i element-ui -S
3.0版本的引入:
npm install element-plus --save然后修改main.js
import Vue from 'vue'
import App from './App.vue'

Vue.config.productionTip = false

//引入ElementUI
import {ElementUI} from 'element-ui';
import 'element-ui/lib/theme-chalk/index.css';
Vue.use(ElementUI);

new Vue({
  render: h => h(App),
})
然后去官网里找一个样例复制一下粘贴到代码中:
   <el-row>
  <el-button>默认按钮</el-button>
  <el-button type="primary">主要按钮</el-button>
  <el-button type="success">成功按钮</el-button>
  <el-button type="info">信息按钮</el-button>
  <el-button type="warning">警告按钮</el-button>
  <el-button type="danger">危险按钮</el-button>
</el-row>
然后就可以看到效果了。
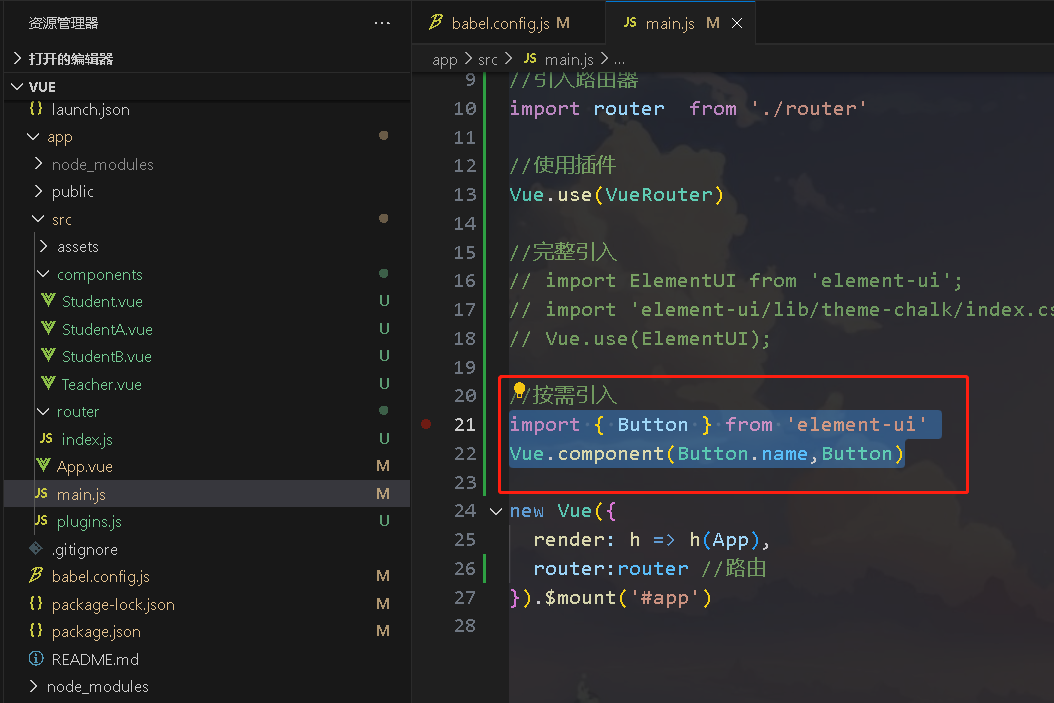
2.按需引用
一般来说,为了方便,项目中基本是完整引用组件。但是,有些情况,我们可以按需引用。
我们执行命令:
npm install babel-plugin-component -D 我们找到babel.config.js文件
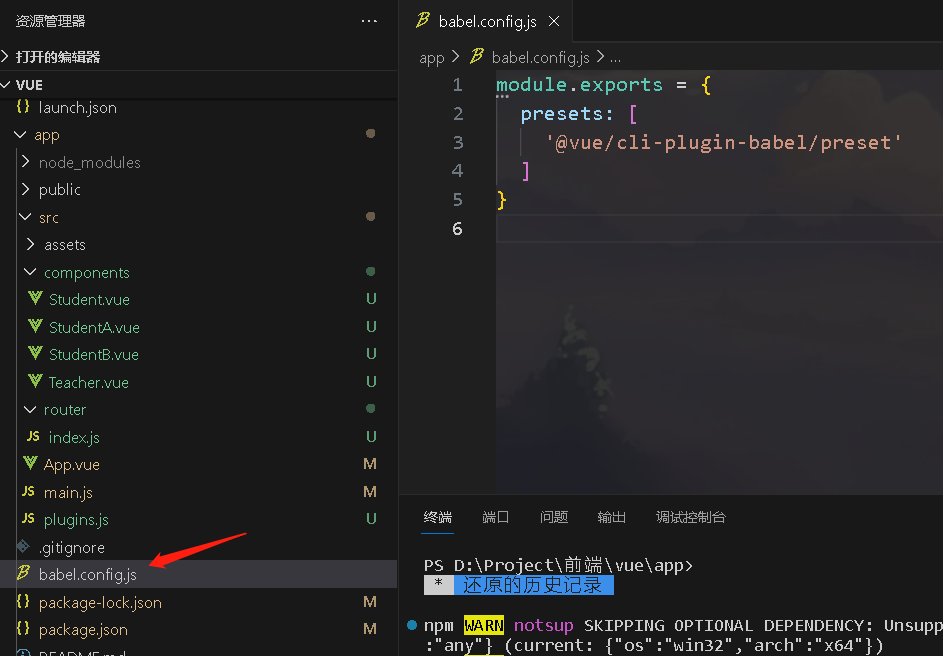
把这个文件修改成下面这样:
module.exports = {
  presets: [
    '@vue/cli-plugin-babel/preset',
    ["@babel/preset-env",{"modules":false}]
  ],
  plugins:[
    [
      "component",
      {
        "libraryName":"element-ui",
        "styleLibraryName":"theme-chalk"
      }
    ]
  ]
}
如果我只需要button,那么我们就修改main.js
import { Button } from 'element-ui'
Vue.component(Button.name,Button)